

Before you replace old bathroom cabinets, confirm they really need replacing, check for hidden water damage, measure the space twice, and set a full budget. Then pick a material built for humidity, plan the removal, and inspect everything when it arrives. Skip these steps and a simple swap can turn into a second remodel. Here are all eight, in order.
If you are shopping for bathroom cabinets near Parma, the prep matters even more than the buying. Many homes around Parma Heights are older, with original plumbing and walls that hide leaks. A cabinet that looks fine from the front can sit on a rotted base or a slow drip. Catching that early keeps the new vanity from failing the same way.
Each step below builds on the one before it. You will check the damage first, then measure, budget, and choose a material that can handle steam every day. Take it one step at a time and the install day tends to go smoothly.
A bathroom is small, but a cabinet swap touches a lot. Plumbing, flooring, walls, and the countertop all meet at the vanity.
That is why surprises are common. Most of them show up after the old cabinet is already out.
The same few problems come up again and again. A new cabinet that is an inch too wide. A drain that does not line up. Rot behind the old base that nobody saw.
Each one is cheap to catch before you order. Each one is expensive to catch after.
A few hours of checking up front saves days of delay later. It also keeps the budget honest.
The steps below take you from “should I even do this?” to “everything is on the porch and ready.”
Start with the simplest question. Do these cabinets need to go, or do they just look tired?
The answer changes your whole budget. A refresh costs a fraction of a full replacement.
Replacement usually makes sense when the damage is in the structure, not the surface.
Look for these:
One or two of these may be fixable. Several together point to replacement.
If the box is solid and dry, you may not need new cabinets at all. Loose hinges, worn finish, and dated hardware are all cheap fixes.
Fresh paint and new pulls can change a bathroom in a weekend. Press on the bottom panel under the sink first. If it feels firm, a refresh is worth considering.
This step is the one most people skip. It is also the one that saves the most money.
A cabinet is often the symptom, not the cause. A slow leak can ruin a vanity, and a new one will fail the same way if the leak stays.
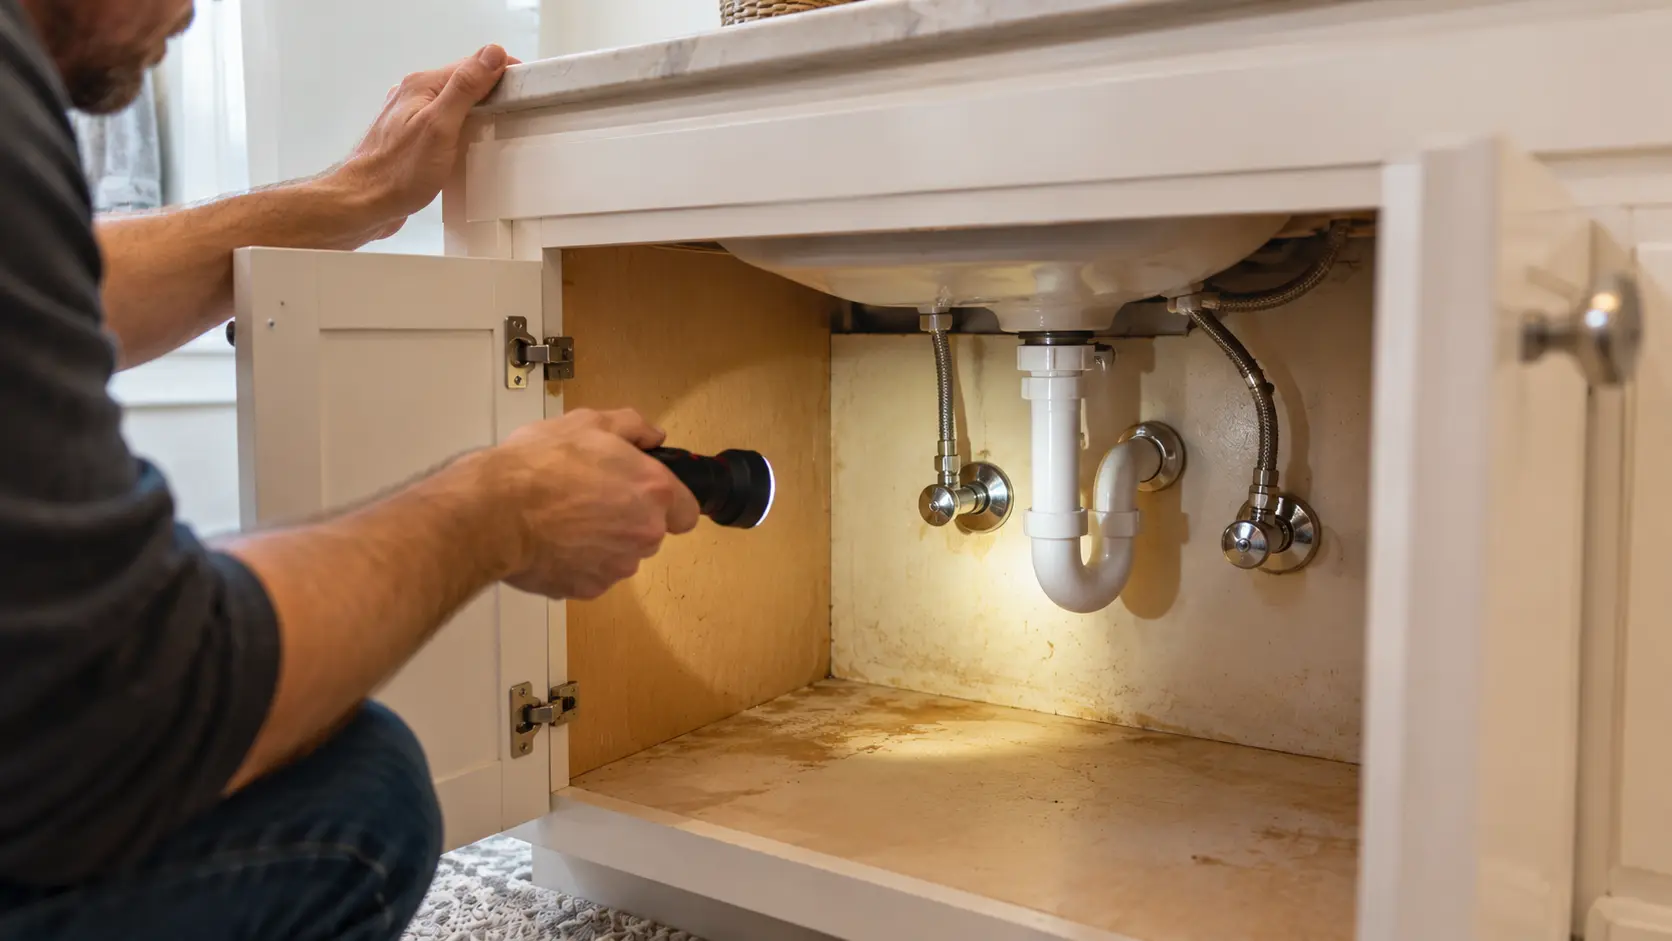
Empty the cabinet and use a flashlight. Check the supply lines, the shutoff valves, and the drain connections.
Run the water for a minute. Then feel for drips along every joint.
Stains on the bottom panel, rust on the pipes, or white mineral crust on the fittings all point to a leak. Fix the leak before the new cabinet goes in.
Look at the wall above and beside the vanity. Bubbling paint, dark patches, or soft drywall mean moisture has been getting in.
Many homes across Parma and Parma Heights are older builds. Older walls and older pipes tend to hide more surprises. If anything looks off, have it checked before you close it back up.
Measure once, write it down, then measure again on a different day. It sounds fussy. It prevents the most common ordering mistake.
Measure the wall space where the cabinet will sit, from wall to wall or to the nearest obstruction. Then measure depth from the wall to the front edge of the old cabinet.
Check the height too. Note the distance to the window sill, the mirror, and any light fixtures above.
Write each number down with the date. If something does not match, you will know which one to recheck.
Vanities come in two common heights. Pick one before you order, because it changes how the sink and faucet fit with everything around them.
Standard bathroom vanities are about 32 inches high, while comfort height models rise to about 36 inches, according to a cabinet buying guide from Sticks and Stuff.
Taller adults often prefer comfort height. Families with young children often prefer standard. For more on this choice, read how vanity cabinet height affects comfort before you decide.
Measure where the drain and supply lines come out of the wall. Note their height off the floor and their distance from the nearest side wall.
Do the same for outlets and switches. Bathroom outlets near water need GFCI (Ground Fault Circuit Interrupter) protection, so check that yours do.
Moving plumbing adds cost fast. A cabinet that fits the existing layout is usually the cheaper route.
Before you pick a style, list what lives in the bathroom now. Count the daily items, the bulky backups, and the things that do not belong there at all.
This small exercise tells you whether you need drawers, doors, or both.
Drawers make small items easy to find. They also need a cutout around the drain, which reduces usable depth.
Doors give you a big open space for tall bottles and cleaning supplies. They work well for a family bathroom where bulk storage matters.
Many homeowners mix the two. Drawers on one side, a door on the other.
A powder room needs less storage than a family bathroom. A shared bathroom needs space for several people.
Think about the next few years too. If kids are growing up or a parent is moving in, the storage needs may shift.
This is the step that decides how long the cabinet lasts. The finish is what you see. The material underneath is what holds up.
Plywood is made of thin layers of real wood, glued with the grain running in alternating directions. That layering gives it stability when humidity changes.
MDF (Medium-Density Fiberboard) and particleboard are made from compressed wood fibers and resin. They are smooth and affordable. But once water reaches the core, they can swell and stay swollen.
For a room that sees steam every day, plywood is the safer default. Several cabinet guides reach the same conclusion for sink bases and vanities.
Even good material fails if the cut edges are not sealed. Ask how the maker seals plumbing cutouts, toe kicks, and exposed edges.
Look at the back panel too. A solid, well-fastened back keeps the box square and resists moisture from the wall side.
When you shop, ask to see a real cabinet box, not just a door sample. You can browse cabinet styles online first, then compare the construction in person.
Cabinet price is only part of the total. Plan for the whole job, then add a cushion.
Prices swing widely with size, material, and style. Prefabricated vanity cabinets are the most affordable. Custom work costs the most.
CostHelper puts prefabricated vanity cabinets at roughly $200 to $800 each. Custom cabinets run much higher. One 2026 cost guide puts custom units at about $700 to $1,000 each, before installation.
The cabinet is rarely the only line item. Plan for these as well:
Add 10 to 15 percent on top for surprises. In a bathroom, there is almost always one.
Now think through the actual day. Know who is doing what, in what order, and where the old cabinet will go.
Turn off the shutoff valves under the sink. Open the faucet to drain the lines. Place a bucket under the P-trap (the curved drain pipe) before you loosen it.
Then disconnect the supply lines and the drain. Take a photo of the plumbing before you start, so you can match it later.
Next, remove the countertop and sink if they are separate. Most are held by caulk and a few screws.
Removing an old cabinet is usually a short job. Hauling it away is what adds cost.
Check your local trash rules for bulk items. In Cuyahoga County, some neighborhoods have scheduled bulk pickup, and others require a drop-off.
A like-for-like vanity swap is a reasonable DIY job if you are comfortable with basic tools and plumbing connections. Moving pipes, adding outlets, or repairing rot is different.
If any of those apply, bring in a pro. A mistake behind the wall costs far more than the labor.
You are almost done. The last step is making sure what arrives matches what you ordered.
Open every box. Check for dents, chipped edges, and missing hardware.
Compare the model, size, and finish to your order. Do it right away, while returns are simple.
Set the cabinet in place without fastening it. Check that it sits level, that the plumbing lines up, and that the doors and drawers clear everything around them.
Then mark the studs, level the base, and secure it to the wall. Only after that do you set the countertop and connect the plumbing.
Northeast Ohio adds its own twist. Humid summers and cold, damp winters both stress bathroom cabinets.
Near Parma Heights, many homes have older walls and original plumbing. That makes Step 2 even more worthwhile.
If you are comparing bathroom cabinets near Parma, seeing the cabinet box in person helps. It is easier to judge edge sealing and back panels by hand than from a photo.
Here is the short version:
Do these in order and the install day is usually uneventful. That is the goal.
Replacing bathroom cabinets does not have to be stressful. Most problems come from skipped prep, not from the work itself.
Take a weekend, check for water damage, measure carefully, and price the whole job. Then choose a material that can handle steam every day. You will thank yourself when the new vanity drops into place on the first try.
RTA Cabinets Ohio works with homeowners across Parma and nearby Cuyahoga County communities, including the Parma Heights neighborhood near Brookpark Rd and Ridge Rd. The area sits close to John Petruska Park, at coordinates 41.4125425, -81.7460591, for anyone mapping a visit. Homeowners here often start with a simple question about bathroom cabinets, and a clear plan makes every answer easier.
Get Bathroom Cabinets Near Parma Heights Services Now
How do I know if my bathroom cabinets need to be replaced?
Replace them when the damage is structural. Soft or swollen wood, a cabinet pulling off the wall, doors that will not close flush, and mold that keeps returning are the main signs. Loose hinges or a worn finish can usually be repaired.
How long does it take to replace bathroom cabinets?
A simple like-for-like vanity swap can often be done in a day or two once everything is on hand. Projects that involve moving plumbing, repairing water damage, or replacing flooring take longer.
Can I replace bathroom cabinets without replacing the countertop?
Sometimes. If the new cabinet has the same footprint and the sink fits the old top, it can work. Most vanity tops are cut for a specific base, so many homeowners replace both together.
Do I need a plumber to replace a bathroom cabinet?
Not always. Disconnecting and reconnecting supply lines and a drain is a manageable DIY task for many people. If pipes need to move or a leak needs repair, hire a licensed plumber.
What should I measure before ordering bathroom cabinets near Parma?
Measure wall-to-wall width, depth from the wall, and height to the window or mirror. Then note the drain and supply line positions, outlet locations, and door swing clearance. Measure twice before you order.