
Choosing a vanity is mostly a measuring job, and the wall width is only the first of ten numbers that matter. Front clearance, drain position, door swing, and floor build-up decide whether a cabinet that fits on paper actually works once it is installed. This checklist walks through all ten checks in the order they should be done. Run it before you order and most of the common problems never get a chance to happen.
Most people start with a picture. A finish they liked, a shape they saw somewhere, a colour that suits the tile.
That is a fine place to end up. It is a difficult place to start.
The room sets the limits first. Once you know what the space allows, the pretty part gets easier, because half the options rule themselves out before you have to choose between them.
Work in this order and you will not fall for something that cannot physically go in.
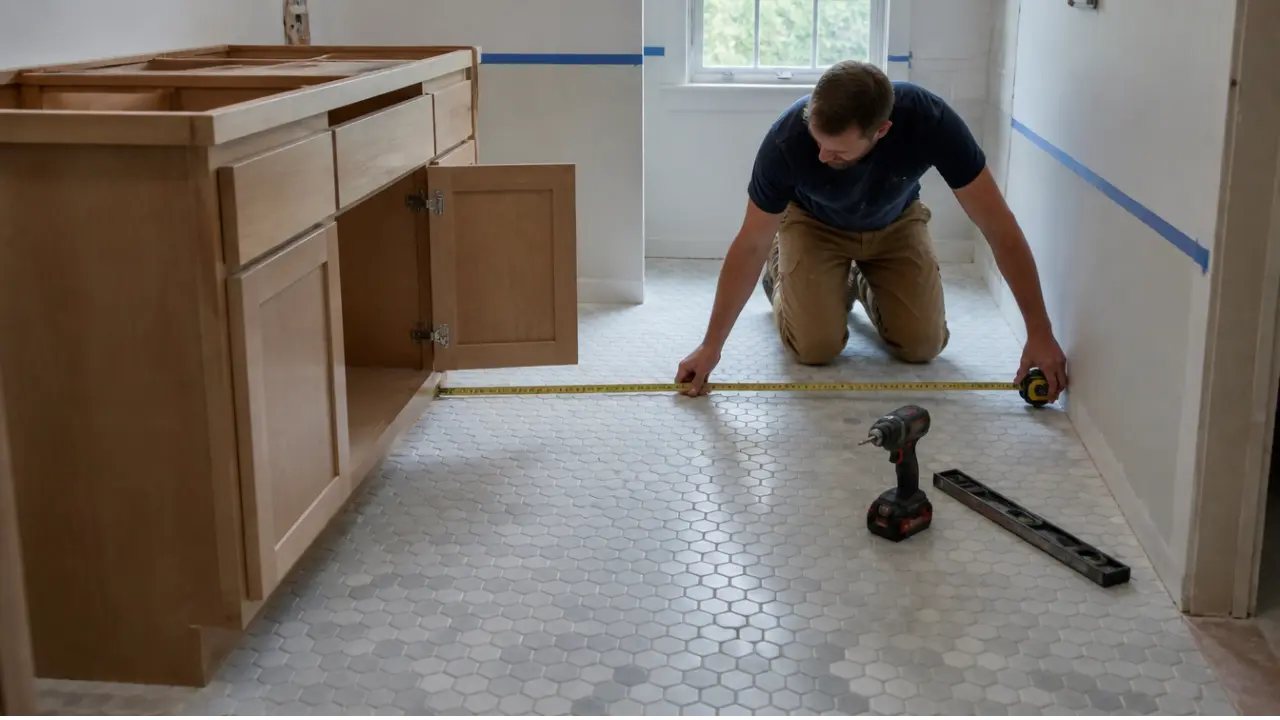
Start with the wall the vanity will sit against. Measure the full run, wall to wall or wall to the nearest fixed obstacle.
Take the measurement three times: at floor level, at waist height, and near the top of where the cabinet will reach. Old walls are rarely square, and the smallest of the three numbers is the one that counts.
Baseboard trim eats width if the cabinet sits flush to the wall. So does a corner bead on drywall.
Light switches, outlets, and towel bars sit inside the run too. A 36 inch cabinet in a 37 inch gap works right up until a switch plate lands where the countertop overhang wants to go.
Write down every obstruction with its distance from the corner. That single sheet of paper solves most sizing arguments later.
Width tells you what fits against the wall. Clearance tells you whether the room still works with it there.
Measure from where the front face of the vanity will be to the nearest thing in front of it: the opposite wall, the tub edge, or the toilet.
The International Residential Code sets a minimum of 21 inches of clear floor space in front of a lavatory. That is the number a building inspector checks against.
The NKBA (National Kitchen and Bath Association) bath planning guidelines recommend 30 inches instead, on the grounds that 21 inches passes inspection but feels tight every single day.
In a bathroom two people share in the morning, the difference between those two numbers is obvious. Local codes can also be stricter than the model code, so confirm with the building department if you are moving fixtures.
Building code requires at least 21 inches of clear floor space in front of a bathroom vanity, while the NKBA bath planning guidelines recommend 30 inches for comfortable daily use.
The drain and the supply lines are already somewhere. Everything about sink placement follows from where.
Mark the centre of the drain on the floor or the wall and measure to each side wall. Do the same for the hot and cold supply lines.
For a single sink, the drain should land somewhere near the middle third of the cabinet width. Push it much further out and the trap starts fighting the cabinet’s internal structure.
For a double sink you either reuse the existing drain for one basin and add a second, or move both. Adding a drain is real plumbing work, not a fitting swap, so it belongs in the budget conversation early.
If the vanity is shifting sideways by more than a few inches, expect the supply lines to need extending too.
Two different doors matter here, and people usually only think about one.
The room door comes first. Open it fully and mark where the leading edge lands. If the vanity sits in that arc, either the vanity moves, the door gets rehung to swing outward, or you look at a pocket door.
The cabinet doors come second. A hinged door needs its own width of space to open. A drawer needs its full extension, which on a soft close glide is close to the full depth of the box.
Stand in the room and mime it. Open an imaginary drawer while an imaginary person stands at the toilet. Awkward is easier to fix on paper.
Vanity height comes in three broad ranges. Standard sits at 30 to 32 inches, comfort height at 34 to 36 inches, and lower accessible builds usually land between 29 and 34 inches.
The number that matters is the finished surface, not the cabinet box. Subtract the countertop thickness, which is typically about 1.25 inches for quartz or granite, to get the box height you actually order.
Decide this before you shop rather than after. It is one of the few vanity dimensions that cannot be adjusted once the plumbing and mirror are set around it.
Width drives this more than preference does.
Single sink vanities commonly run 24 to 48 inches. Double sinks need roughly 60 inches at a minimum, and 72 inches is where two people stop bumping elbows. Below 60 inches, a single basin with extended counter beside it gives you more usable surface than two cramped bowls.
An undermount basin sits below the counter and adds nothing to the finished height.
A drop-in sink rests its rim on top, adding a quarter inch or so.
A vessel sink sits fully above the counter and can add five or six inches. Pairing one with a comfort height cabinet puts the rim near chest level, so vessel sinks generally want a lower box.
Pick the sink before the cabinet. Doing it the other way round is how people end up with a basin they have to reach up into.
There is a side-to-side rule as well as a front one. Code asks for at least 15 inches from the centreline of a lavatory to the nearest sidewall, and the NKBA recommends 20 inches.
That rule quietly sets a minimum wall width. A 30 inch vanity with a centred basin needs roughly 35 inches of wall to satisfy the code figure, and closer to 45 inches to hit the recommendation.
Check it before falling for a wide cabinet in a narrow alcove.
Standard vanity widths run from 24 to 72 inches, and 30 to 36 inches covers most single sink bathrooms, while a double sink generally needs 60 inches or more.
Storage is where a vanity earns its place, and the split between drawers and doors matters more than total volume.
Drawers suit anything you use daily. You see the whole contents at once instead of reaching into a dark cupboard.
Doors suit bulk: spare towels, cleaning supplies, the big bottles.
Directly under the basin, the drain and the P-trap take the space a full drawer would use.
Cabinet makers work around this with U-shaped drawers that wrap the plumbing, or with a false drawer front where a top drawer would normally sit. Neither is a compromise as long as you know it is coming.
Small rooms need a sharper plan than large ones, and there is a fuller breakdown of how to get storage in a small bathroom layout working without crowding the floor.
Two surfaces, two separate checks, both easy to skip.
A wall-hung vanity carries its whole weight, plus the countertop and a basin full of water, on the wall behind it.
That needs solid blocking between the studs, not drywall anchors. If blocking is already in from a previous install, it sits at one height, and moving up or down means opening the wall.
Find out what is behind the drywall before you commit to a floating unit.
Set a level on the floor across the width of the vanity run. Older homes settle, and a slope of half an inch across 48 inches is common enough.
Then check the flooring plan. If new tile is going down after the vanity, the finished floor rises and your counter height rises with it. If the tile stops at the vanity face, the cabinet sits on the subfloor and you may need to shim.
Decide the flooring sequence before the cabinet arrives, not after.
Now the checks turn from the room to the cabinet itself.
A bathroom is a damp room. Steam, splashes, and the air around a sink base work on whatever the box is made from.
Plywood handles that better than particleboard or MDF (medium density fibreboard). The cross-laminated layers resist swelling and hold screws under repeated door swings.
Cut edges are the vulnerable point. Wherever a panel is drilled for plumbing, the core is exposed, and that is where cheaper materials swell first. All-plywood construction gives more margin there.
Ask what the box is, not just what the doors are. The two are often different.
Bathroom lighting is unforgiving. A warm white that looks right under showroom light can read yellow under a cool LED.
Hold a door sample against the tile, the flooring, and the wall paint, in the actual room, at the time of day you use it most. Photos on a screen will not settle this.
Hardware finish follows the same rule. Match it to the faucet rather than to the cabinet, since the faucet is what your eye lands on.
The last check is logistics, and it decides your schedule.
Ask when the cabinet ships and whether the style you want is stocked or ordered. If a plumber is booked, the cabinet needs to be there first.
RTA (ready to assemble) cabinets arrive flat packed and go together with basic tools. They cost less to ship and fit in a car.
Pre-assembled units arrive built and go straight into place, which suits anyone who would rather not spend an evening with a screwdriver.
Either way, confirm what is included. Countertops, sinks, faucets, and hardware are often separate line items, and finding that out on delivery day is a poor time to learn it.
Check the warranty term and what it actually covers while you are asking.
Open the boxes on delivery day rather than the day the plumber arrives.
Count the pieces against the order, look at the door faces under decent light, and check corners and edges for transit damage. Flat packed panels travel well but they are not immune.
Damage reported the same day is a straightforward replacement. Damage found three weeks later, after the cabinet is assembled and plumbed, is a much harder conversation.
Bathroom remodels remain one of the most planned home projects, with 29 percent of homeowners naming one among their projects for the coming year in a 2026 national renovation survey.

The sequence matters as much as the list.
Points one through four are pure measurement and they cost nothing but an evening. Do them all before you look at a single product page, because they eliminate most of the catalogue on their own.
Points five and six are decisions that depend on those measurements. Height and sink configuration only make sense once you know what the room allows.
Points seven and eight bring in the parts of the job that happen behind the scenes, and they are the ones most likely to change your budget.
Points nine and ten are the comparison stage. By then you are choosing between a handful of cabinets that all fit, which is a much easier decision than choosing from everything.
Homeowners usually find the last two points settle faster in person than on a screen. Standing in front of real bathroom vanity cabinets tells you more about build quality in thirty seconds than a product description will, and the cabinet finishes on display for Strongsville homeowners look noticeably different under real light than they do in a photograph.
Westwood Farms sits on the west side of Strongsville in Cuyahoga County, a settled residential area where a lot of the original bathroom layouts are still in place. The neighbourhood centres on Westwood Farms Pool, and the crossing at Prospect Rd and Westwood Dr connects it to the rest of the city. For anyone mapping the area, the coordinates are latitude 41.3224944, longitude -81.8563824.
The same measuring questions come up across Northeast Ohio, since homes of a similar age share the same original rough-in positions and the same tight bathroom footprints. Directions, hours, and details for bathroom vanity cabinets in Strongsville are listed on our Google profile.
What should I measure first when choosing a bathroom vanity?
Measure the wall the vanity will sit against, wall to wall, at three different heights. Take the smallest of the three numbers. Then measure the clear floor space in front, which needs to be at least 21 inches to meet code and 30 inches to feel comfortable in daily use.
How much clearance do I need in front of a bathroom vanity?
The International Residential Code sets 21 inches as the minimum clear floor space in front of a lavatory. The NKBA bath planning guidelines recommend 30 inches instead. Local codes can be stricter, so confirm with your building department if fixtures are moving.
Can I fit a double sink vanity in my bathroom?
Generally you need about 60 inches of wall width as a minimum, and 72 inches for two people to use it comfortably at the same time. Below 60 inches a single basin with extended counter beside it usually gives better everyday function than two narrow bowls.
Does the drain position limit which vanity I can buy?
It limits where the sink can sit, which in turn limits the cabinet. For a single sink the drain should fall within roughly the middle third of the cabinet width. Moving a drain is plumbing work rather than a simple fitting change, so measure and mark it before shopping.
Are ready to assemble vanities as sturdy as pre-assembled ones?
Construction quality comes from the materials and the joinery rather than from where assembly happens. An all-plywood RTA (ready to assemble) box built correctly performs the same as the equivalent pre-assembled unit. The real difference is convenience, shipping cost, and whether you want to spend an evening putting it together.